This shop has been compensated by Collective Bias, Inc. and its advertiser. All opinions are mine alone. #GiftofPhilips #CollectiveBias Read below on how to make a DIY Bathroom Storage Caddy.

I would venture to say that most of us have storage issues in our bathroom. The cabinets in our bathroom have zero shelves in them. When we first moved in a got some of the plastic storage bins for underneath which has helped organize things, but a few of our larger items like hair dryer, curling iron, and our Philips Sonicare 2 Series toothbrush that I picked up at Target. I have always wanted something that hangs on the door for those larger items that I use everyday that help me to put my fist face forward, but I also wanted it to be removable so that when I need to charge the toothbrush or use the hair dryer I can easily pull it out. Hence came the plans for a DIY Bathroom Storage Caddy.
How to make a DIY Bathroom Storage Caddy
My hubs came through on this project in a big way. I didn’t want anything too complicated and he helped me brainstorm and put this easy caddy together.
- Start by measuring the inside of your cabinet to see how wide, tall, and deep that you can make the caddy. Ours wound up being 11″ wide, 5.5″ deep, and 12″ tall.
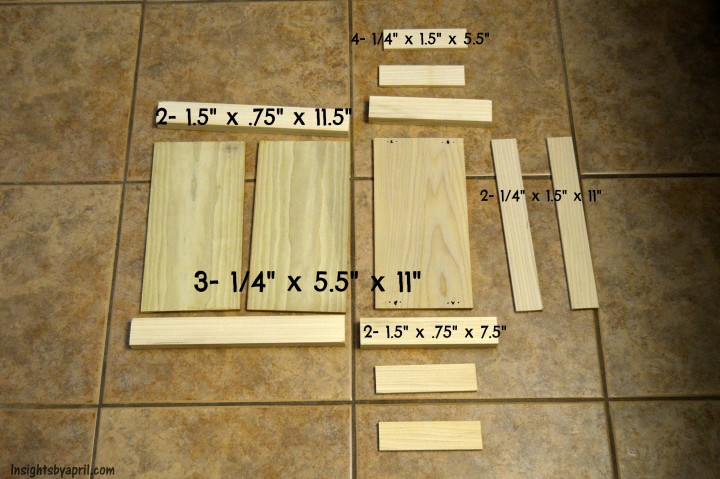
- The wood pieces that you will need cut for this project are 3– 1/4″ x 5.5″ x 11″ flat plank boards, 2– 1.5″ x .75″ x 7.5″ post wood, 2– 1.5″ x .75″ x 11.5″ post wood, 4– 1/4″ x 1.5″ x 5.5″ slat boards, and 2– 1/4″ x 1.5″ x 11″ slat boards.
- Sand down the edges of all the boards and posts since there may be some splintering and rough edges after cutting the pieces.
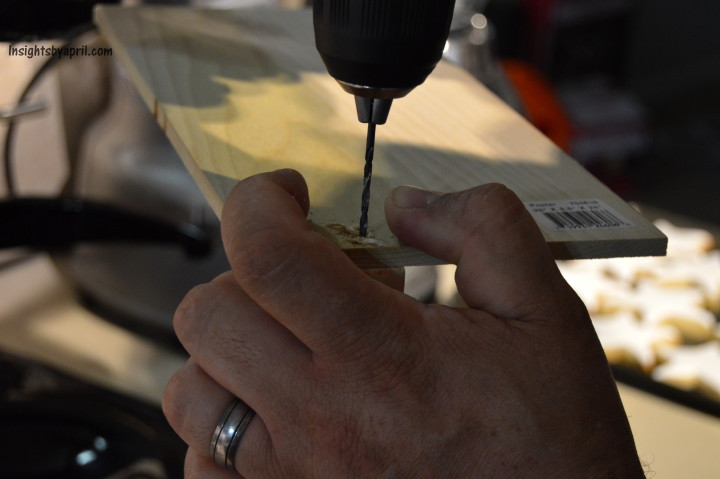
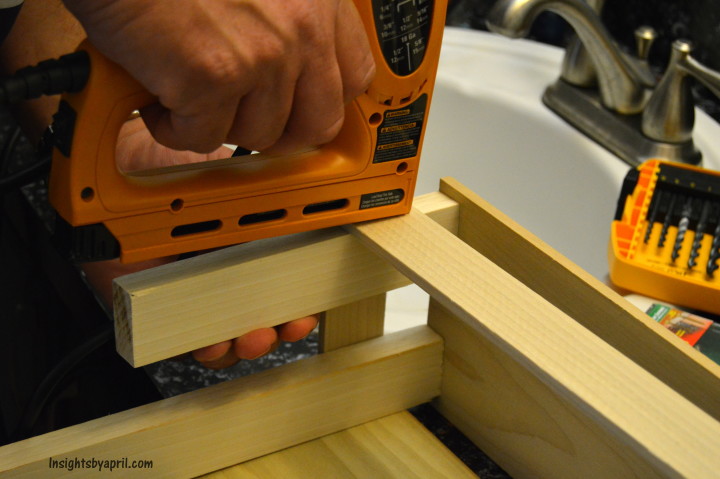
- What you will want to do is drill pilot holes in the boards and posts for the screws to be able to go in properly. You can do this project with just nails if you prefer not to have the look of the screws. We used screws on the bottom and back pieces to give it a little more stability. The front plank pieces we just used a nail gun.
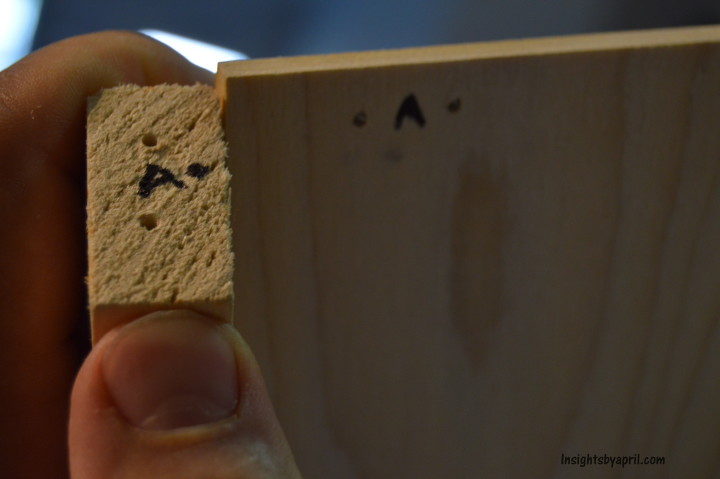
- To help make sure the right pieces go in the correct order, label them as you drill the pilot holes for the screws.
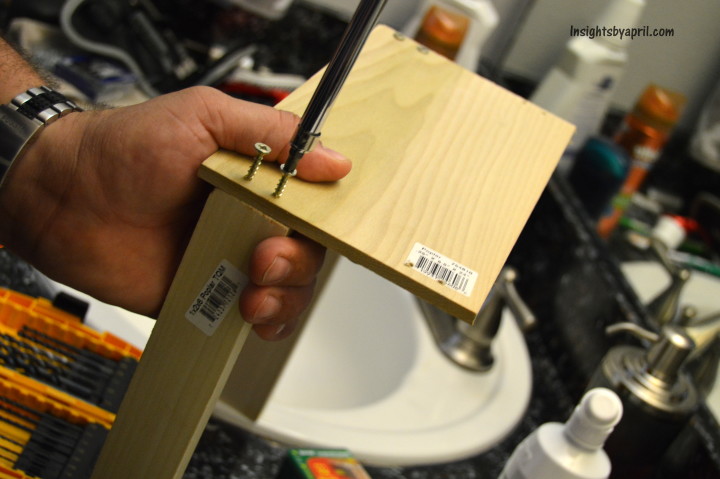
- Screw the posts into the bottom flat panel piece using the two shorter posts up front with the larger ones in the back.
- I wanted the plug for the Philips Sonicare toothbrush to be able to go in and out the back of the caddy so we left a space on the bottom back open just wide enough for the plug to go through.

- Screw in the back flat pieces to the taller posts.
- Nail the long slat board across the front of the caddy almost like you are building a fence. Now at this point you could have the slat boards stacked so that there is no open spaces, but I liked that I could see what was in the caddy.
- Nail the shorter slat boards to the sides.
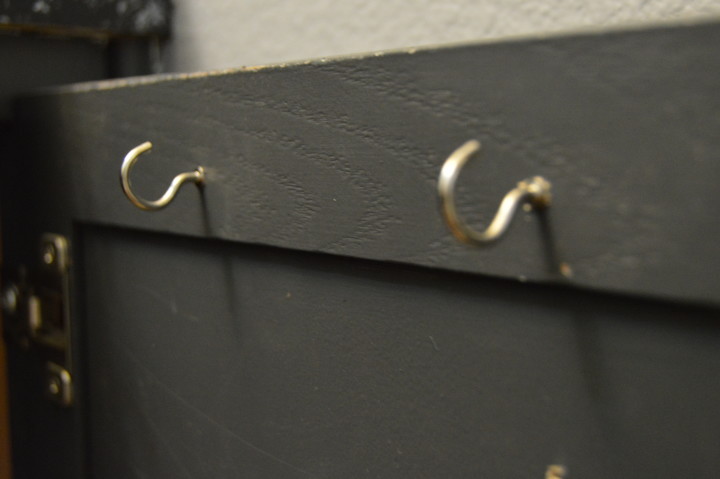
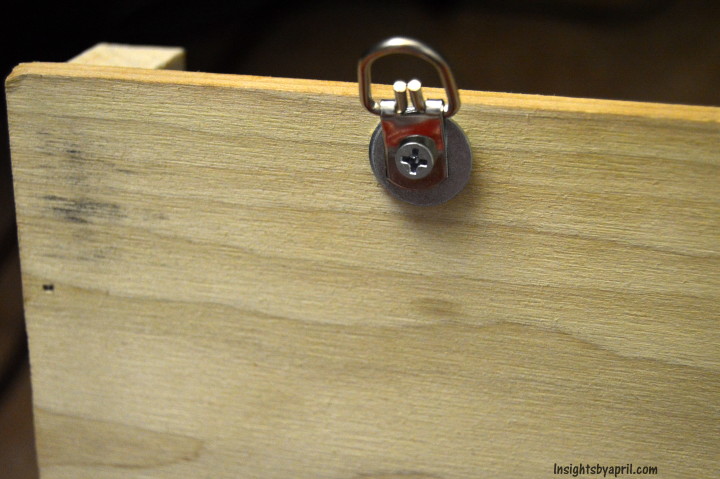
- Since I wanted the caddy to be able to come in an out of the cabinet, we added two eye hooks to the cabinet door, then two d hooks on the back of the caddy. Whenever I need to charge the toothbrush, I can easily bring out the caddy onto my bathroom counter and charge it.
- Just like that you have your own DIY Bathroom Storage Caddy ready to use. You could paint or stain yours if you want it to blend more into the cabinets rather than standing out.
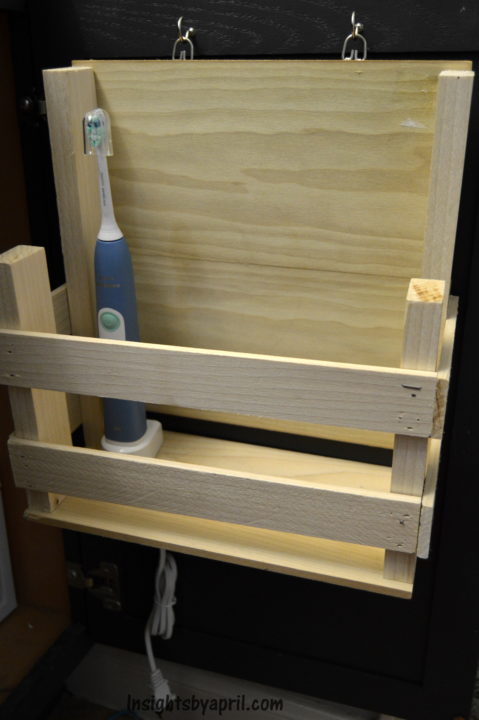
The Philips Sonicare 2 Series comes in three exclusive colors at Target. I was able to pick up the blue one while I was there and it fits my bathroom decor 🙂 Now I can put my best face forward by using the Philips Sonicare 2 Series so my smile shines by removing up to 6x more plaque than traditional brushing, and my bathroom will have a cleaner more organized look. My teeth get that extra clean feeling so that I can go out and feel proud of how I look. The DIY Bathroom Storage Caddy would make a perfect easy gift for those on your holiday list that love organization. It can be used as something that sits out on their counter or under their cabinets.


I love this!! It’s so great and perfect of storing things neatly. Thanks for sharing!